Sunday, November 1, 2009
It's self supporting!
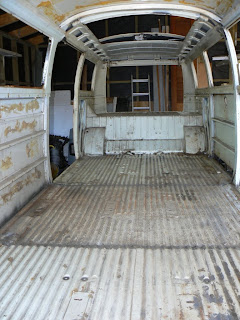
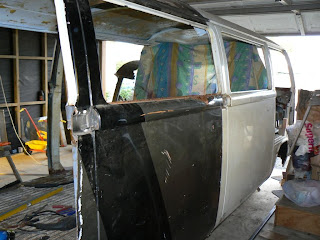
The certifier was happy with how I had the pieces lined up and the stringlines I had put in place so it was all go for welding it together! I had started with one of the floor joints and regretted it as I kept burning holes - it was almost impossible to tell where the metal was Ok and where it had rusted from underneath (what used to be between the cross member and floor). So took some time and a bit of welding wire to fill some of the holes I had created. The roof welded up well and folding the roof of the middle section into the sunroof opening made it much easier as it only required one full weld across the roof and spot welds to the folded in roof section to the sunroof frame. It is now off the blocks and sitting only on blocks at the front and back. Feels really solid inside when you jump/walk around which is good as I am still to add some stiffness into the walls when I plug the two extra doors (will only have one sliding door directly behind the passenger seat). There is still plenty of welding to do - removing some bits of rust and plugging the doors etc and then it's on to the engine and suspension (which will be the next big milestone!) Not that many weekends left this year and with christmas quickly approaching the weekends I do have a re quickly filling up with other events so quite possibly not much progress until next year! Watch this space! :-)
Tuesday, October 6, 2009
It's ready to be checked
Got the third piece trimmed and lined up last weekend. Unstitched the middle section again too to adjust slightly. Found it really hard to get them all lined up perfectly straight as it appears some of the sections may not be entire straight or twisted or same width as the others. And there aren't a lot of straight panels on these vans (most are slightly curved) which makes it hard to get stringlines up to check straightness of the all pieces tacked together. The 4mm channels made life a whole lot easier as it did line the floor/chassis rails up properly at least. I've got the person certifying it coming round tomorrow to check what I have done and advise on where I need to straighten/adjust more or if OK as is. I believe the floor is OK and so want to weld that up and then try and fine tune the roof by using diagonal braces from floor to roof. It's only out by a mm or two but still! The floor is nice and square and the measurements along the length of the van are out by about 0.5mm which isn't bad I reckon. Overall length now that all the pieces are together is 6.7m without bumpers. So my estimate of just under 7m seems pretty spot on when you allow for another few hundred mm's for the front and rear bumpers.
Sunday, September 27, 2009
Finally progress again
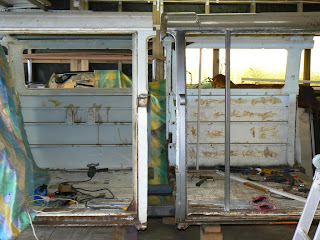
Most of you keeping track of progress on this site have probably given up now since nothing has changed for the last few months. I did get a couple of weekends of work in and have made some more progress. The first two sections are now lined up properly and tack welded together. I won't do more than the few tacks I have until I have the end section joined to it as well and everything checks out nice and straight.
I have used two custom folded 4mm steel 'C' channels to sit inside the original chassis rails. Using these as well as lengths of 30x30mm SHS in the gutters I lined up the two pieces. I then checked various points with stringlines and made some minor adjustments to a point where I think (note think not know!!) it is now pretty straight. It's hard as there aren't many straight sections in/on the van as most things have a slight curve so stringlines are pretty hard to set up. Measurements inside aren't much better as one side isn't always the same as the other making it hard to get diagonal measurements inside either. It looks pretty spot on when sighting down the gutter and along the outside of the van. Below are some pictures of the two pieces being 'joined' together.
I did not join on the reinforcing member but slightly offset for the walls and roof and joined the floor on the cross member. For the window on the far side I joined the inner and outer skins in two seperate locations to add more strength and also allowed me to gauge whether everything was lined up properly when the outer and inner window skins matched properly.
Hopefully get the back section joined to the front two over the next couple of weekends. So keep checking back! :-)
.
.
.
.
.
.
.
.
.
Sunday, June 14, 2009
Last update for a month and a bit
Have now lined the pieces up in a row (not properly but to get an idea of what it will actually look like). When we come back from our holiday I will then be able to align the pieces properly and cut them to suit ready to spot weld together. Looks much longer than I had anticipated but then again it will loose about 1/2 metre from where the sections will be joined. I think actual finished length should be just under 7m!
Sunday, June 7, 2009
Finished painting underneath
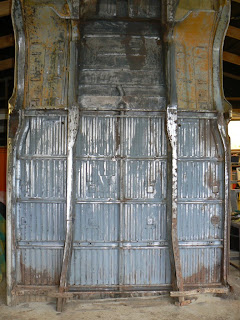
I have now got all three sections cleaned up and painted underneath. The middle and end sections still need some rust work to the inner sills but nothing major. The end section also has a couple of bad holes in the floor but these will be easier to fix from above once the section is on the ground again (rather than standing up). Next step now is to drop all the pieces back onto the ground and roughly line them up. That will create room in the garage again for Beck to put her car back in the garage too and as we're off overseas for a holiday in a couple of weeks I won't get any more work done until we get back late July. By the way I didn't miss that section of floor when I was painting - this area will be cut out to make room for the engine so I figured there was no point in painting it. I did clean it up as I will use that section of floor to repair other rusted areas.
Wednesday, May 27, 2009
Work starts on the back section
Got some more work done over the weekend and have also been doing a bit of work at night for an hour or two most days. Started getting the end section ready for painting. This had similar reinforcing panels underneath to those I found on the front section though it only had them on the outsides not the middle (the front section had the middle part covered by a panel as well). I couldn't quite the end section fully upright as it hit the ridge beam in the garage so I had to prop it up as high as I could which makes for a bit of an awkward angle for working on it.


To date I have cut out the panels and given the underside of the floor a good going over with the wirebrush on the drill and a screwdriver/chisel to scrape all the underbody seal off and expose the paint. I applied a thin coat of paint stripper and scrubbed it down to remove any bad paint. Now I need to wash it down with degreaser and then paint it. With 3 weeks until we head off on our Europe trip that will probably be as much as I will get done before we go. I might start lining the three pieces up and think about where to cut them neatly to get a nice tight join - but probably won't make a start on cutting.
Sunday, May 10, 2009
Painting the underside
Finally some more pics. Did a little more work over the last couple of weeks and progressed with cleaning/tidying up the underside of the front and middle sections. I didn't quite go fully to bare metal but did strip it back more than I thought. The sections still had remnants of the original primer in places which I left so long as it was intact. I wirebrushed all the surfaces to ensure that any loose paint was removed before painting. The paint I am using is Metalfix which there are two different types. The first coat is Metalfix which can be painted directly onto rusted (but wire brushed) surfaces and it reacts - much the same as rust converter - with this rust neutralising it and bonding properly to the surface. I did a full coat of this on both sections and then overcoated them with Metalfix1000 which doesn't have the rust converter in it so is good for protecting clean (non rusted) or prepainted surfaces. This paint should be as good as POR15 from what I have read / been told and its water based so makes cleanup much easier. I did brush it on rather than spray it as thats what the recommendation is - spraying would require thinning and that is not recomended. The middle section had its final coat of black Metalfix1000 which the front section will get this week. The outer sills and main chassis rails have not been painted as they still require further work but that can't really be done until I get the pieces welded together. Once I've got the front section done I can then move onto the rear section which still needs to have its underfloor support sheets cutout similar to what the front section had and then needs to be cleaned and painted.
plan is to weld all the pieces together and then spray one or two coats of enamel paint all over underside to seal it - though Metalfix1000 can be left as final coat.
Middle section all cleaned up and ready for first coat of paint:
First coat of paint - Metalfix (still drying hence the shiny spots!)
And with all three coats on - 1 metalfix + 1 red metalfix1000 + 1 black metalfix1000
The front section ready for first coat of paint
First and second coats applied to front section - still waiting for black coat. Note that the top section (under cab floor) will not be painted until later as I need to cut out and weld in new floor sections. So will paint once all the pieces are welded together as its too hard to repair the floor 2.5m up in the air as it is at the moment! Will be much easier once I drop this section back down onto the floor!
and again close up - looks so good!! like new! :-)
Monday, April 13, 2009
A little more progress
I started thinking about getting the pieces lined up and welded together but then decided that maybe I should clean up the underside of each of the sections first. I started on the middle and front sections and found a little bit of rust in each. Have removed all of it from the front section but still need to weld in a couple of new steel pieces. The sliding door track was also rotten and so I removed the entire track and lower sill section. Unfortunately you can only get sliding door track sections for a LHD not RHD so I had to custom make my own which still needs to be welded into place also. I've done the inner sill by the sliding door which had started to rust out along its length and welded in little patches for the front floor cross rails under the floor. Will also put in new cross members and outriggers.
the passenger side repair to the floor cross rail and the inner sill
the drivers side floor rail repair
the sliding door side without the outer sill and track
The middle section has a previous rust repair patch which I still intend to remove and and re-work. It doesn't look like it was done all that well - possible just an extra bit of steel welded over the top of the rust. To prevent it from rusting further behind the patch I will cut out the patch check for any remaining rust and then weld a new patch into place.
After 'digging' around for rust I decided that it may pay to apply some paint stripper to all the surfaces to remove any loose flaking paint and to roughen up the good paint so that I can apply a new coat of paint to the underside before joining the pieces together. The front section has had an additional coat of paint applied under the cab area which wasn't prepped properly and so doesn't stick that well in places but OK in others - a bit of a pain to get off. The middle section had underbody seal on it (the tar like stuff) and while the paint stripper does soften it nicely it turns into a messy goo that is quite hard to get off! So still a little more work to go before I'm ready to paint them but we're making progress at least.
the area under the cab (still needs a little more tidying up before painting)
the 'cargo' area floor virtually ready to paint (needs washdown light sand/steel wool rub down)
Wednesday, March 11, 2009
The engine and dash
Bought a LS400 (or Toyota Celsior to be exact) which has a full alloy 4.0L V8 engine. The car had rear accident damage but it has all the electronics etc for the engine and I'm hoping to use a fair few of the other parts off it too; possibly suspension, brakes etc and interior items such as electric windows and the dash.
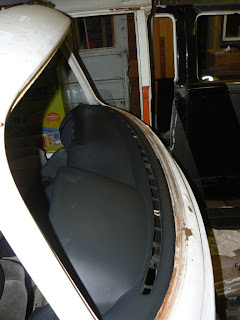
Have started fitting the dash into the kombi and the curve along the front edge almost perfectly matches that of the kombi windscreen frame! Will still need to modify it to make sit slightly further forward and also trim the sides back as the dash is too wide. Once all that is done I will take it to a dash repair specialist to get it recovered incld the new sides etc.


Have started fitting the dash into the kombi and the curve along the front edge almost perfectly matches that of the kombi windscreen frame! Will still need to modify it to make sit slightly further forward and also trim the sides back as the dash is too wide. Once all that is done I will take it to a dash repair specialist to get it recovered incld the new sides etc.


Subscribe to:
Comments (Atom)


