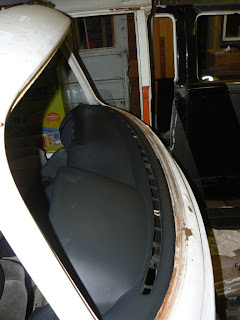
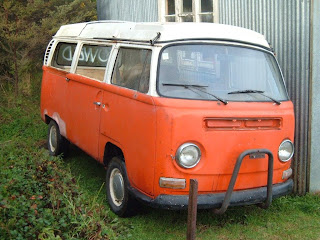
Have started fitting the dash into the kombi and the curve along the front edge almost perfectly matches that of the kombi windscreen frame! Will still need to modify it to make sit slightly further forward and also trim the sides back as the dash is too wide. Once all that is done I will take it to a dash repair specialist to get it recovered incld the new sides etc.
Wednesday, March 11, 2009
The engine and dash
Bought a LS400 (or Toyota Celsior to be exact) which has a full alloy 4.0L V8 engine. The car had rear accident damage but it has all the electronics etc for the engine and I'm hoping to use a fair few of the other parts off it too; possibly suspension, brakes etc and interior items such as electric windows and the dash.
Have started fitting the dash into the kombi and the curve along the front edge almost perfectly matches that of the kombi windscreen frame! Will still need to modify it to make sit slightly further forward and also trim the sides back as the dash is too wide. Once all that is done I will take it to a dash repair specialist to get it recovered incld the new sides etc.
Cutting into pieces
Here are some photos of the vans when I cut them.
The photo below was when we finally got our garage finished and I managed to get all the pieces from my mates place (Chris) home. All the stripping out and cutting etc had been done in a good sized shed he has which was brilliant. They live kind of rural too so when I went up there for a weekend I could work hard at it all weekend without upsetting too many neighbours! A little bit harder now that the pieces are at home and I'm doing all the work amongst other houses who want to enjoy their weekend!
Stripping out interiors, mechanical and electrical
I haven't got many photos of the stripping down process - pretty boring really though it's amazing what you find under the dash and other items that don't usually get removed. There are some pretty old coins / receipts / etc to be found.
The white van will form the front part, the silver one the middle and the orange van the rear end. Obviously they will all be stripped back and repainted one colour!
The vans I started with
Van 1 - White 1972 (or very late 1971) RHD with no engine and interior largely stripped out. In tidy condition with respect to rust and body.
Van 2 - A 1971 from what we can establish. This was a 'factory' camper conversion as it has the roof opening properly framed out as found on sliding roof models. This was a LHD and so was not a prime candidate for a restoration. Had some interior but not full set and has had previous rust repairs with bad existing rust particularly around windscreen frame.
Van 3 - Not sure of age on this one and obviously in pretty rough state. But very cheap and we only cut the middle section from this van.
Finally!
I finally decided that maybe I better start a site with photos etc on the stretched limo VW Kombi van I am working on in New Zealand. I started on this project in 2006 and worked on it for about a year. The project then remained dormant for a couple of years as other events took priority. I will try and keep some up to date photos and a little bit of text on this site. I have searched the web for other similar projects with not much information being available. So if you have come across this site and are working on a similar project please feel free to contact me or comment. Thanks, Dan
Subscribe to:
Posts (Atom)